
Seasonal & festival
Thekua Recipe with Ghee: Dough, Shaping and Frying for Chhath
On this page
- What Ghee Does in Thekua
- Ingredients and Preparation
- Make the Jaggery Solution Without a Thick Syrup
- Get the Dough Firm, Not Soft
- Rub the ghee into the flour first
- Add liquid gradually
- Shape Evenly, With or Without a Mould
- Fry Slowly Enough to Cook the Centre
- Check the heat before adding a batch
- Fry one test piece, then work in small batches
- Common Thekua Problems and Their Fixes
- The dough cracks badly during shaping
- The pieces break in the kadai
- The outside darkens before the middle cooks
- The cooled thekua is hard or greasy
- Cooling, Storage and Festival Planning
- Conclusion
Thekua is closely associated with Chhath, especially in households across Bihar, Jharkhand and eastern Uttar Pradesh. Made with wheat flour, a sweetener and fat, these patterned sweets look simple, but their texture depends on small decisions: how thoroughly you rub in the ghee, how much liquid you add and how patiently you fry.
This thekua recipe with ghee uses jaggery and a firm dough that can be shaped by hand or pressed onto a mould. Family recipes and prasad practices differ, so follow your household’s customs for ingredients, utensils and handling. Use the method below as a practical cooking guide, not a replacement for those traditions.
What Ghee Does in Thekua
Ghee mixed into flour before adding liquid is often called moyan. It coats some of the flour and helps create a shorter, crumbly bite rather than a chewy texture. Too little can leave thekua hard; too much can make the uncooked pieces fragile.
For a manageable starting point, use about 45 g ghee for 250 g atta. The flour should feel evenly sandy after mixing, without visible pools of fat. Ghee contributes flavour, but neither its aroma nor the finished thekua’s colour can establish its purity.
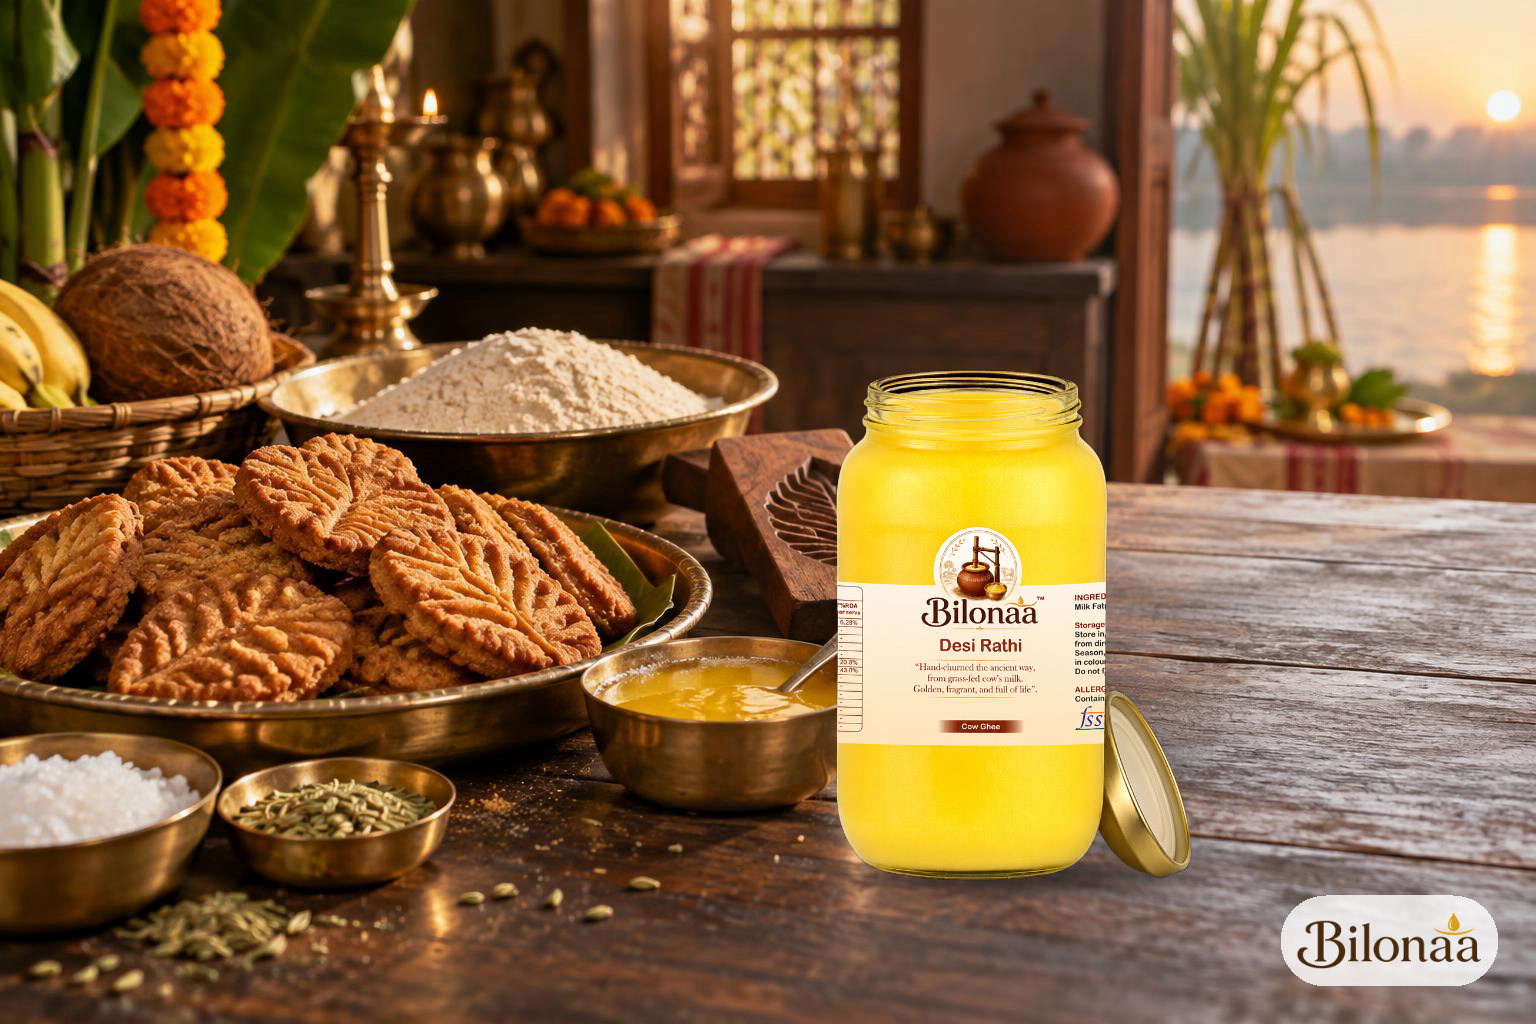
If traditionally churned desi cow ghee is your household preference, Bilonaa’s Bilona A2 Rathi Cow Ghee is one option for this recipe. The cooking technique remains important whichever ghee you choose: careful proportions and controlled heat matter more than adding extra fat.
Ingredients and Preparation
This quantity makes approximately 14–16 medium thekua, depending on size. Allow around 60–75 minutes for preparing, shaping and frying, followed by cooling time. Weighing the flour and ghee is more reliable than using loosely filled cups.
For the dough, measure 250 g whole wheat atta, 100 g grated or finely chopped jaggery, 45 g gently melted ghee, 1 teaspoon lightly crushed fennel seeds and ¼ teaspoon cardamom powder. If your family recipe includes coconut, add 1 tablespoon finely chopped dry coconut; large pieces can interfere with shaping.
For the jaggery solution, start with 60 ml water. Keep another 1–2 tablespoons water separately for adjusting the dough only if needed. You will also need enough ghee for deep-frying in your chosen kadai; this is separate from the 45 g used in the dough.
Keep a heavy kadai, slotted spoon, mixing bowl, small saucepan and a clean, dry shaping surface ready. A thekua mould is useful but optional. Use utensils and ingredients that meet your family’s Chhath preparation practices.
Make the Jaggery Solution Without a Thick Syrup
Combine the jaggery and 60 ml water in a small saucepan. Warm gently, stirring just until the jaggery dissolves. You are making a solution to sweeten and bind the dough, not a one-string syrup. Prolonged boiling evaporates water and makes the liquid harder to distribute.
Strain the solution if it contains visible grit or particles, then let it cool to room temperature. Hot liquid makes the dough harder to judge because it changes the consistency of the ghee and flour mixture.
Jaggery varies in moisture and colour, so your dough may need slightly more or less liquid than another batch. A darker jaggery can also produce darker thekua; colour alone is not a reliable guide to whether the centre has cooked.
Get the Dough Firm, Not Soft
Rub the ghee into the flour first
Combine the atta, fennel, cardamom and optional dry coconut. Add the melted ghee once it is comfortably warm rather than hot. Rub it through the flour with your fingertips until the mixture looks evenly crumbly.
Squeeze a small handful. It should hold a loose shape when pressed, then break apart when nudged. This is a useful texture check, not a reason to keep adding ghee until the mixture forms a solid lump.
Add liquid gradually
Pour in the cooled jaggery solution in two or three additions, mixing and pressing the flour together. Stop and assess before adding the last portion. The dough should come together when squeezed but remain noticeably firmer than roti dough.
If dry flour remains after pressing, add the reserved water one teaspoon at a time. Avoid pouring in water simply because the surface looks slightly rough. A stiff dough can have small surface cracks while still being suitable for shaping.
Bring the dough together with brief pressing rather than long kneading. Cover and rest for about 10–15 minutes, then check again. If it crumbles completely when flattened, work in another teaspoon of water. If sticky, add a little atta, recognising that larger additions will alter the sweetness and ghee balance.
Shape Evenly, With or Without a Mould
Divide the dough into 14–16 similar portions and keep them covered while working. Press each portion firmly between your palms, then flatten into a disc roughly 5 cm wide and 8–10 mm thick. An even thickness matters more than a perfectly round outline.
Close deep cracks around the edge before adding a pattern. Small surface lines are normal, but cracks extending towards the centre can widen in the kadai. Avoid making a thick central mound with thin edges, which will brown unevenly.
For a wooden mould, press the disc gently onto the clean, dry patterned surface and release it carefully. Use only a very light film of ghee if sticking occurs. With no mould, make shallow lines using a fork or the back of a clean skewer.
Keep impressions shallow enough that the disc stays intact. Deep cuts create weak points. Arrange shaped pieces in a single layer and cover lightly so they do not dry out while the frying ghee heats.
Fry Slowly Enough to Cook the Centre
Check the heat before adding a batch
Heat the frying ghee in a stable, heavy kadai, leaving ample headroom; do not fill the vessel more than halfway. If using a suitable cooking thermometer, around 150–160°C is a useful starting range. Adjust according to how steadily the pieces cook rather than treating the number as an absolute rule.
Without a thermometer, lower a tiny piece of dough into the ghee. It should develop steady bubbles and rise gradually, not darken immediately. Almost no bubbling suggests insufficient heat; rapid browning means the ghee is too hot. Never use water to test it.
Fry one test piece, then work in small batches
Begin with one thekua to check that it holds its shape and browns gradually. Lower pieces gently, away from you, and leave space between them. Adding too many together reduces the temperature and makes them difficult to turn without damage.
Let the surface set before moving the pieces. Turn gently as needed and maintain steady, moderate bubbling. Medium pieces may take roughly 7–10 minutes, but thickness, batch size and heat all affect timing. Do not increase the flame sharply just because browning seems slow.
Look for an evenly browned surface, firm edges and somewhat reduced bubbling. Drain with a slotted spoon and cool on a rack or suitable absorbent paper. For a practice batch made separately from prasad, break a cooled piece to check that the centre is cooked rather than dense and doughy.
Thekua firms as it cools, so judge crispness after cooling rather than straight from the kadai. Between batches, remove loose crumbs before they burn. Keep wet utensils away from hot ghee, and never leave the kadai unattended.
Common Thekua Problems and Their Fixes
The dough cracks badly during shaping
First squeeze a portion firmly. If it binds but the edges split, smooth and compress the edges before making impressions. If it falls into crumbs, add water a teaspoon at a time to the remaining dough. More ghee is not the automatic solution.
The pieces break in the kadai
Possible causes include excess moyan, insufficient binding, deep impressions or turning too early. Check the uncooked pieces for cracks and try one smaller test piece. If the dough feels unusually greasy and fragile, work in a little atta, then reassess whether a few drops of water are needed.
The outside darkens before the middle cooks
Reduce the heat and allow the ghee temperature to settle before continuing. Make the remaining pieces slightly thinner and more uniform. Jaggery dough can brown quickly, so raising the flame to finish faster often makes this problem worse.
The cooled thekua is hard or greasy
Hardness can result from too little moyan, excessive kneading or prolonged frying. A greasy finish may follow frying at insufficient heat or inadequate draining. For the next batch, return to measured ingredients and use one test piece to assess the heat before filling the kadai.
Cooling, Storage and Festival Planning
Let thekua cool completely in a single layer before packing. Sealing warm pieces traps moisture and softens the surface. Once cool, transfer them to a clean, dry, airtight container and store away from sunlight, heat and dampness.
Storage life varies with moisture, ingredients, climate and handling, so avoid assuming every homemade batch will keep for a fixed number of weeks. Prepare close to the occasion where practical. Discard pieces showing mould or an unusual smell; do not taste them to check.
For a larger Chhath batch, make dough in manageable portions instead of leaving a large uncovered mound beside the stove. Keep raw and cooled pieces on separate trays, and follow your household’s customs about tasting and handling prasad before offering.
Conclusion
Good thekua depends on a few repeatable habits: distribute the moyan evenly, add jaggery solution gradually, keep the dough firm and shape pieces to a consistent thickness. Patient frying gives the centre time to cook without pushing the outside too dark.
If you are planning your festival ingredients, explore Bilonaa’s traditionally churned ghee range and choose a pack that suits your kitchen. Keep your family’s recipe at the centre, and use these dough, shaping and frying checks wherever they help.
Bilonaa Promise
Small-batch, A2 desi-cow, traditional bilona ghee — straight to your kitchen.
100% pure, hand-churned, slow-cooked on a wood fire and packed in glass jars.
FAQs
Quick answers
How much ghee should I add to thekua dough?
For this recipe, start with 45 g ghee for 250 g atta, excluding frying ghee. Rub it evenly into the flour before adding liquid. Adding much more can make the pieces fragile.
Can I use sugar instead of jaggery in thekua?
Yes, sugar-based versions are also made. Use a recipe with proportions suited to sugar rather than swapping blindly, as sweetness and liquid requirements can differ. Follow your household’s preferred version for Chhath prasad.
Should thekua dough be soft like roti dough?
No. It should be firm and hold together when pressed, without feeling sticky. Add water only in small increments if it crumbles completely. Soft dough can lose its pattern and become difficult to handle.
Why is my thekua soft immediately after frying?
Freshly fried thekua can be tender and becomes firmer as it cools. Cool a piece fully before judging the texture. Persistent softness may indicate excess dough moisture, a thick centre or insufficient cooking.
Do I need a wooden mould to make thekua?
No. Flatten equal portions between your palms and make shallow patterns with a fork or the back of a clean skewer. Keep the thickness even and avoid cutting deeply into the dough.
Educational content only — please consult a doctor for medical conditions.
Get gentle ghee notes in your inbox
One thoughtful Ayurveda + kitchen note a week. No spam. Unsubscribe anytime.
Conversation(0)
Share a thought — every comment is read before it appears.